

Postman is a popular platform that is used for API development and testing. The easy-to-use and simple interface helps make the API development process faster and more efficient.
Users of Postman can send HTTP requests and get responses which makes the API building, testing and debugging process simple.
Features of Postman
- The Postman API enables users to access any data that is stored in the Postman account easily.
- Postman offers a set of tools to help design, test, document APIs and also share and collaborate on the API development process.
- Postman has different types of workspaces for personal use, teams to collaborate as well as public workspaces. These help in organizing the APIs effectively.
- The Governance feature in Postman API gives the API design rules, industry best practices and good development practices to help teams design the best APIs for use.
Installing Postman
Postman can be downloaded and installed on your laptop for use. See here for more details. You can also use Postman on the web. There is a CLI tool and Newman which can run collections from command line.
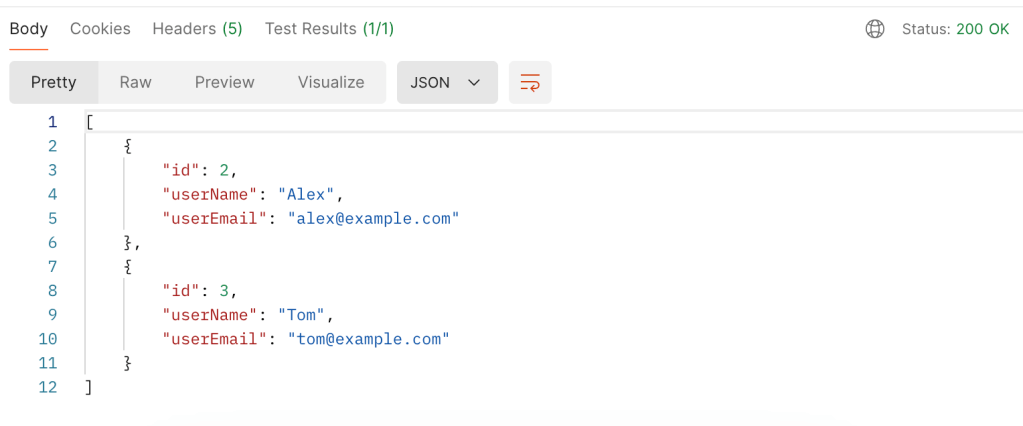
Postman Interface – Sending an HTTP Request
Remember the simple User REST API app that we created in a previous blog post? If you haven’t read Your Ultimate Guide to Understanding REST APIs yet, I highly recommend that you do. Now let us see how we do the GET request from Postman.
curl GET http://localhost:8080/users
- You can create a new request by clicking the + sign above the request tab.
- The drop down menu in the interface has a list of HTTP methods such as GET, POST, PUT etc. The box next to it is where we enter the URL path of our request.

3. You can add parameters, headers, authorization etc for your API below the request bar.

4. Once you click the “Send” button, the request should be sent.
5. At the bottom you will find the response window with the results, status code, time taken for the request etc.
Postman Collections
You will notice an icon called Collections on the left side. This is where you can organize your APIs based on use cases. Each collection is a set of endpoints and API calls for a particular application.

Collections can be easily saved, shared and collaborated on by importing or exporting the collections.
Authorization in Postman
Postman has a lot of different types of Authorization that can be enabled including OAuth 2.0 which is the most popular type.

To use OAuth 2.0, enter the request details in the request tab with the necessary parameters, body etc.
Click the Authorization Tab.
Select OAuth 2.0 fro the drop down menu.
Configure the Settings with the token name, type and other credentials.
Click “Request Token” once all the fields are filled out.
Once you have the token, Postman will add it to the Authorization header automatically and you can now send your requests to the API.

Postman Environment Variables
Environment Variables in Postman enable you to save values that are used frequently in variables to load them dynamically during request execution. You can use them across different environments such as prod, dev etc.

- Click the Environment Tab in your workspace to create a new environment.
- Name your environment – prod, dev etc.
- Add keys and values for the environment variables. The OAuth token mentioned in the previous section can be stored as an environment variable.
- Save the environment.
You can also save global variables in the Globals section.
To use these variables in the request, use double curly braces {{ }}. For example
- Authorization Header
Bearer {{authToken}}
- URL
{{baseUrl}}/users
Hope this quick guide helps you get started with Postman. There are a lot more powerful features in Postman. I have linked some additional resources below for further reading.
